Introduction in 3D Modeling
Currently, 3D animation has become an integral part of our daily lives, prominently showcased in social media, movies, films, games, and beyond. Many beloved movies, such as Toy Story, Spider-Man: Across the Spider-Verse, and How to Train Your Dragon, owe their enchanting visuals and captivating stories to the art of animation.

Toy Story

Spider Man: Into the Spider Verse

How To Train Your Dragon
There is a plethora of 3D software available for download on the internet, catering to various needs and preferences. Popular options include Blender, Maya, Unreal Engine, Cinema 4D, AutoCAD, ZBrush, and many others. In this blog, I will introduce the fundamentals of using Maya software for 3D modeling.
Basic Introduction tools in Maya
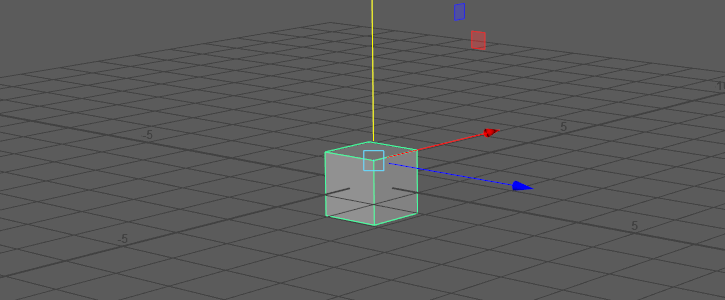
1. Manipulate view
2. Transformation Tools Options
3. Create Polygon
4. Outliner
5. Duplicate
6. Grouping
1. Manipulate view
Dolly In / Dolly Out | Alt + right-drag (Windows) Option + right-drag (Mac) – left to right, you dolly in. – right to left, you dolly out. |
Tumble the camera | Alt + left-drag (Windows) Option + left-drag (Mac) |
Track the Camera | Alt + middle-drag (Windows) Option + middle-drag (Mac) |
2. Transformation Tools Options
 |  Move Tools (Hotkey W) |
 |  Rotate Tool (Hotkey E) |
 |  Scale Tool (Hotkey R) |
You can find the tools box on your left
3. Creating Polygon

Click the Polygons shelf and select one of the 3D shape icons to create polygons.
Create > Polygon Primitives > (Shape) >  .
.
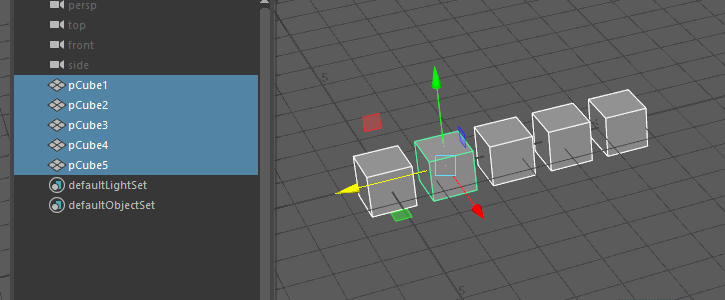
4. Outliner

The outliner in Maya is a tool that displays a hierarchical tree structure of all scene elements, allowing for easy selection, organization, and management of objects and their relationships.
5. Duplicate
Create function of Duplicate (Hotkey Ctrl + D)
Select Edit > Duplicate.
In Autodesk Maya, the “Duplicate” command allows you to create multiple copies of selected objects, with optional transformations applied to each copy, facilitating efficient object replication and manipulation within a scene.
6. Grouping

Create function of Grouping (Hotkey Ctrl + G)
To see the objects within the group, open the Outliner and expand the group node. Click on the object you want to select.
When it comes to the scene hierarchy, the Group command places the selected objects under a new transformation node.
In conclusion, above are some fundamental tools that will help you understand the Maya software interface and facilitate easy modeling.